Creating a "resort-style" bathroom: Freestanding tubs and outdoor showers best practices
The difference between a standard bathroom and one that feels like a luxury retreat comes down to thoughtful design choices that prioritize relaxation and sensory experience. Two elements consistently define this elevated aesthetic: sculptural bathtubs that stand alone as focal points and showering spaces that blur the line between indoors and out.
Selecting Your Freestanding Tub
A standalone bathtub immediately transforms the spatial dynamics of any bathroom. Unlike built-in versions, these pieces need breathing room—plan for at least 6 inches of clearance on all sides, though 12 to 18 inches creates a more luxurious feel. The tub becomes sculpture rather than fixture.
Material selection affects both aesthetics and functionality. Cast iron with enamel coating retains heat exceptionally well, keeping water warm for 30-45 minutes longer than acrylic alternatives. Acrylic weighs considerably less (around 100 pounds versus 300-500 pounds for cast iron), which matters significantly for second-floor installations where floor reinforcement might otherwise be necessary.
Stone resin tubs offer a middle ground—they're lighter than cast iron but retain heat better than acrylic, with a matte finish that feels organic and spa-like. Copper tubs develop a living patina over time, though they require specific cleaning products to maintain their appearance.
Plumbing Considerations That Matter
Floor-mounted tub fillers create dramatic visual impact but require planning during construction or renovation. The plumbing must run beneath the floor, which means either working with a basement/crawl space below or cutting into a concrete slab. Wall-mounted fillers with extended reach offer easier installation while maintaining clean lines.
Water pressure becomes critical with freestanding fixtures. A standard tub holds 60-80 gallons, and nobody wants to wait 20 minutes for it to fill. Your home should deliver at least 5-7 gallons per minute through the filler. Test existing pressure before committing to a specific filler style.
Drainage placement affects tub positioning. Center drains offer maximum flexibility for room layout, while end drains limit orientation options but often cost less to install since plumbing runs are simpler.
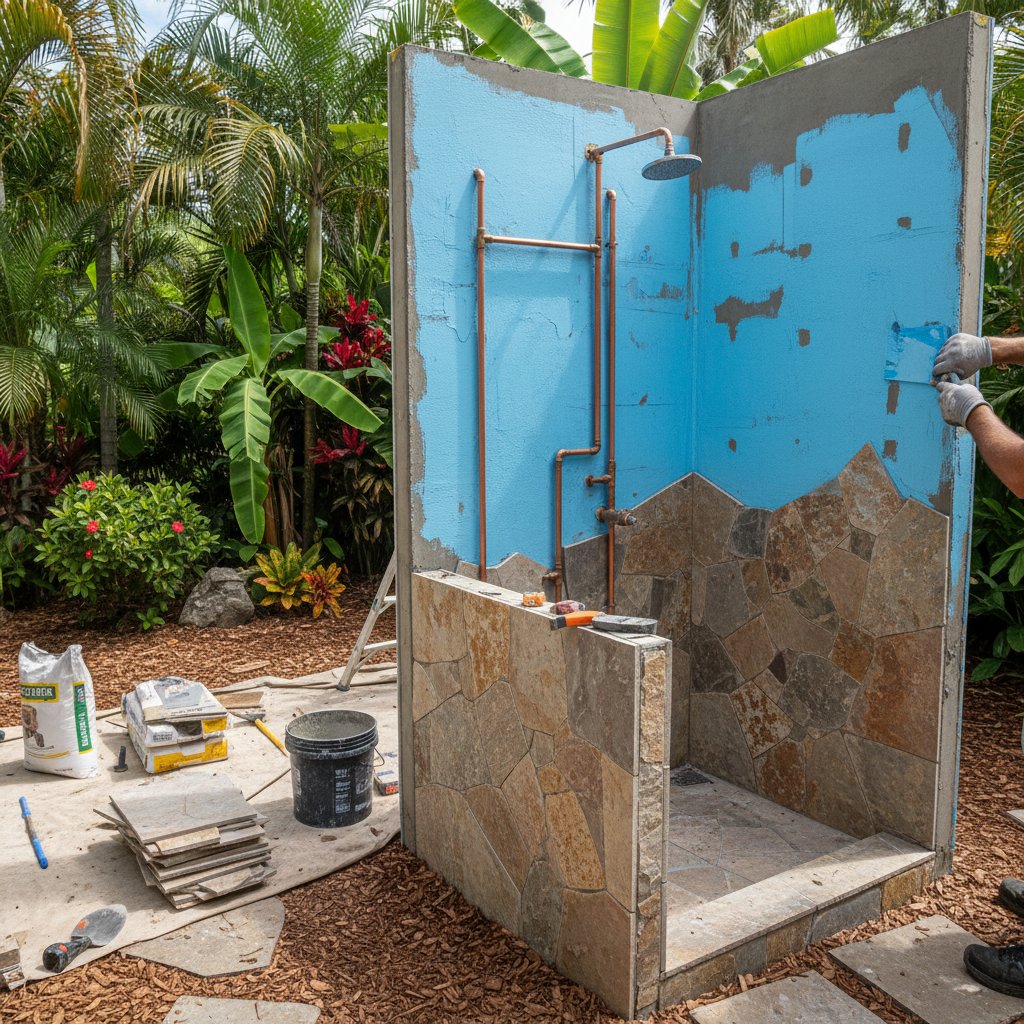
Creating an Outdoor Shower Experience
Outdoor showers range from fully exposed garden installations to semi-enclosed spaces that maintain privacy while connecting to nature. The key distinction from indoor showers is the intentional relationship with natural elements—sunlight, air movement, surrounding vegetation.
For truly exterior installations, frost-proof plumbing is non-negotiable in climates where temperatures drop below freezing. This means running supply lines below the frost line (typically 36-48 inches deep depending on location) and installing drain-down valves that prevent pipe bursts during winter months.
Flooring must handle constant water exposure without becoming slippery. Teak decking provides natural water resistance and develops an attractive silvery patina. Stone pavers with textured surfaces offer grip when wet. Pebble mosaics create natural drainage while providing foot massage—a detail borrowed directly from high-end spa design.
Semi-Enclosed Designs for Year-Round Use
Many homeowners achieve the outdoor shower aesthetic through clever architectural moves that keep the space technically interior. Floor-to-ceiling windows on two or three walls, combined with a skylight, deliver natural light and views while maintaining climate control.
Sliding glass doors that fully retract transform the space seasonally—enclosed during cold months, open to a private courtyard or garden during warmer weather. This flexibility extends the usability beyond the typical 4-5 month window of a purely outdoor installation.
Living walls of ferns, pothos, or philodendrons thrive in the humid shower environment and reinforce the connection to nature. Install waterproof backing and proper drainage systems to protect structural elements from moisture damage.
Hardware and Fixture Selection
Rainfall showerheads with 10-12 inch diameters provide the gentle, enveloping water coverage associated with luxury hotels. Position them directly overhead rather than angled from the wall. Pair with a handheld sprayer on a separate valve for practical washing tasks.
Thermostatic mixing valves maintain consistent temperature even when water pressure fluctuates—essential for outdoor installations where supply lines may be longer and subject to temperature variations. These valves cost $300-600 more than standard fixtures but prevent scalding or sudden cold shocks.
For outdoor installations, choose solid brass fixtures with marine-grade finishes. Stainless steel handles corrosion better than chrome plating, which can pit and peel with constant exposure to the elements.
Lighting That Enhances the Experience
Dimmable LED strips installed beneath tub decks or behind floating vanities create ambient glow without harsh overhead brightness. This indirect lighting mimics the candle-lit atmosphere of spa environments.
For outdoor showers, combine task lighting for nighttime use with strategic uplighting of nearby trees or architectural features. Solar-powered path lights eliminate the need for additional electrical runs while defining the space after dark.
Privacy Without Sacrificing Openness
Strategic landscaping provides natural screening for outdoor showers. Bamboo grows quickly (some varieties add 3-4 feet per year) and creates dense visual barriers. Ornamental grasses like miscanthus reach 6-8 feet at maturity while moving gracefully in breezes.
Slatted wood screens or frosted glass panels offer immediate privacy while maintaining air circulation and filtered light. Position screens to block sightlines from neighboring properties while leaving views of sky or garden open.
The goal isn't to recreate a hotel bathroom at home—it's to capture the feeling of escape and rejuvenation that makes resort bathing memorable, adapted to your specific space and climate.